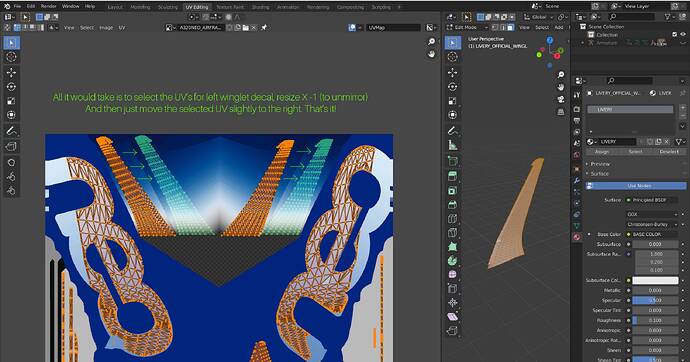
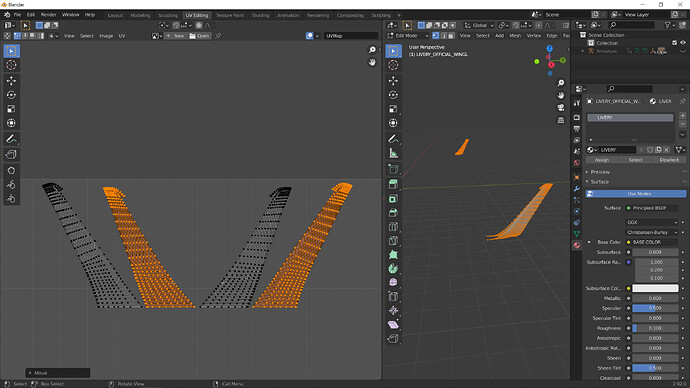
Hi! The default Asobo A320NEO has an issue with the winglet decal texture/uv,
both sides share the same texture-space/UV, even though the texture is clearly
baked/dilated for both winglets having individual UV locations. This causes
whatever logo/text on the decal texture to be mirrored on the left side
(“copied” from the right). Mesh: LIVERY_OFFICIAL_WINGL and
LIVERY_OFFICIAL_WINGR Material: LIVERY Texture:
A320NEO_AIRFRAME_LIVERY_ALBD.PNG It would only require Asobo to move the left
winglet UV coordinates slightly to the right to fix this(and flip
X-direction). This has been reported before, but no fix yet. I’ve been trying
some stuff with the msfs2blender2msfs exporter/merger from FBW.
- Create my own winglet decal mesh with separate UV space for both sides in a separate texture or creating mesh decals. The problem with this method is that I can’t figure out how to attach the new mesh to the wingflex-movement, the decal hangs in a fixed position while the wing is moving.
- Create a transparent dublicate mesh of the default winglet-decal, with correct UV positions, and then try to make the default winglet mesh get its UV coordinates from my corrected duplicates. But doing this I end up with non-matching vertex-numbers for some reason, not working…
Would any of you have any suggestions how to get around this problem…?
And/Or is there a non-desctruve way to to edit the original gltf/mesh and have
left winglet UV coordinates moved X pixels to the right, into the right spot?
Can Submodel Merging be used?
Best Regards Jonas


