Question - Detail Color and Detail ORM

Very interested in an answer to the other question on Detail ORM.

Decided not to hijack that thread. I would also like a bit more info on the

Detail Base color
the detail base color is interpreted as a linear texture ranging between 0 and 1 of which the channels are blended with the primary base color in a linear fashion. In this case, the detail base color textures are interpreted such that a value of 0.5 will produce no changes, values below 0.5 will darken the primary base color and values above will lighten it.
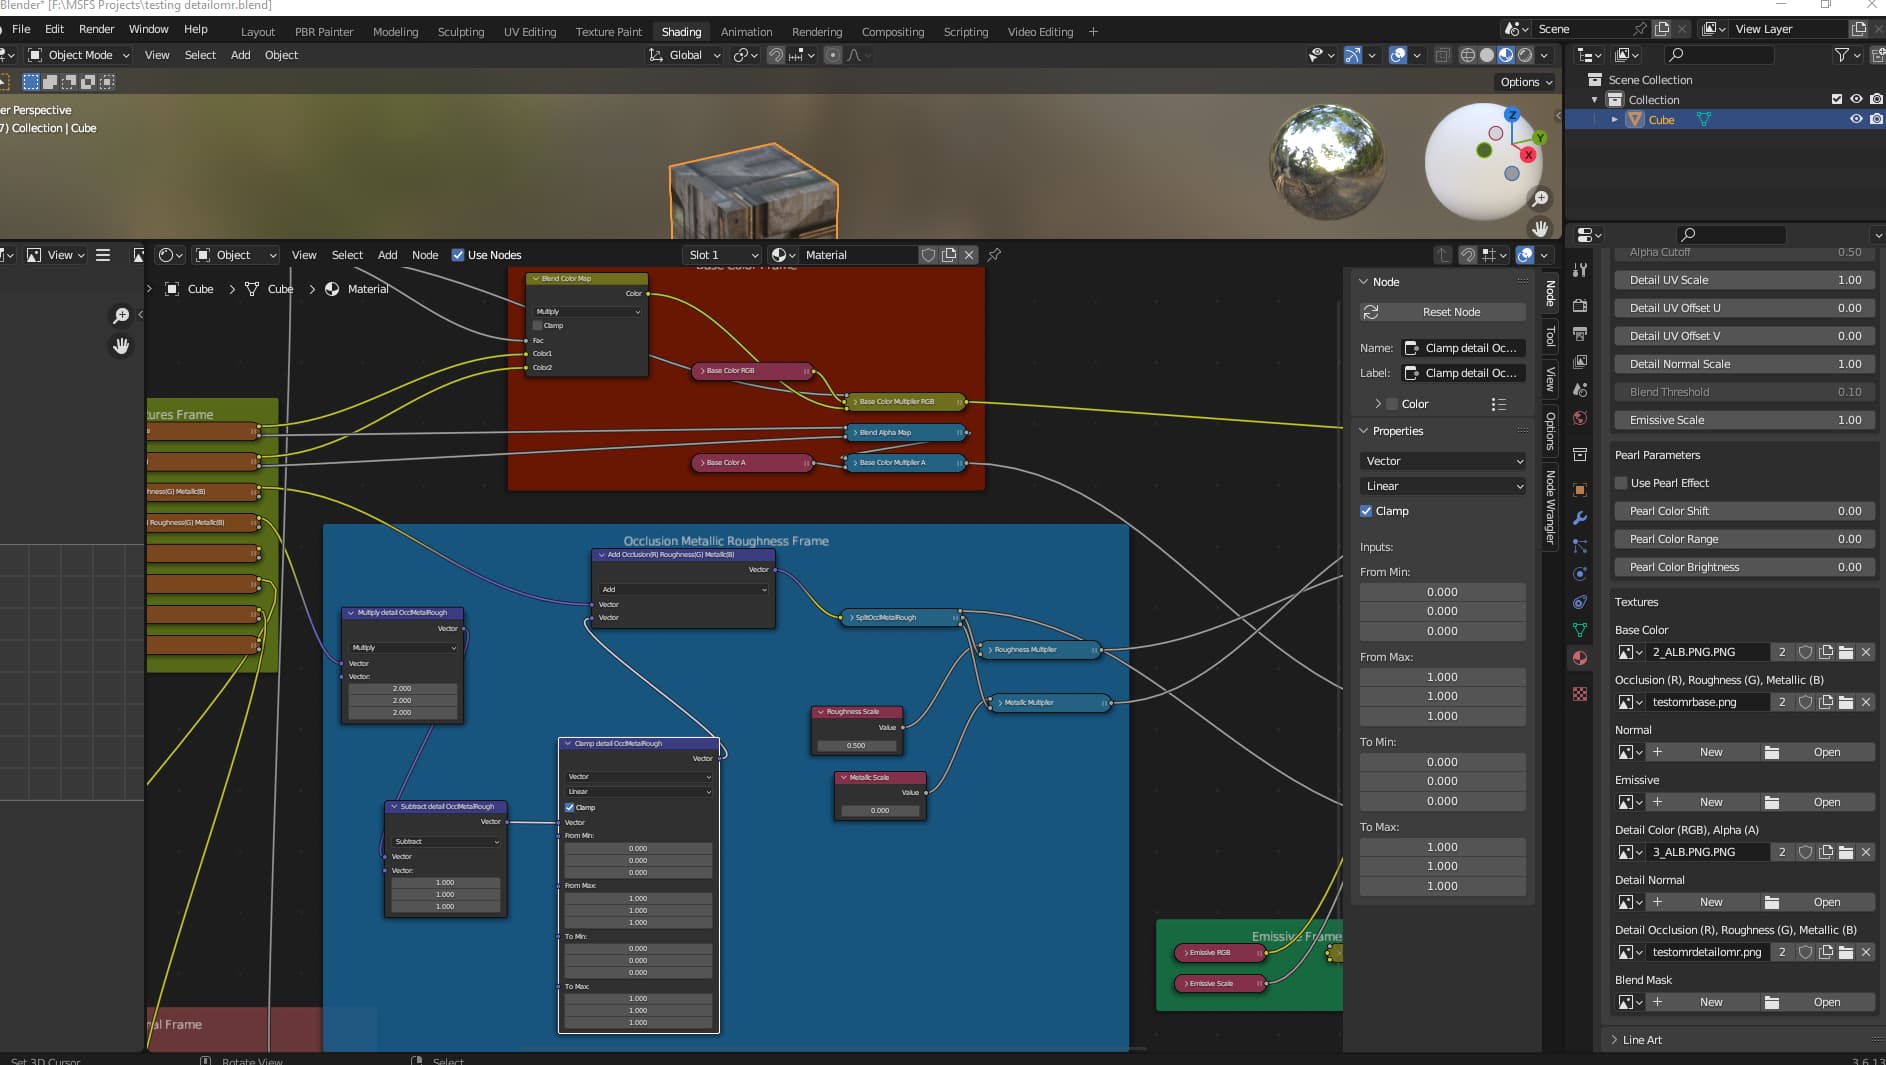
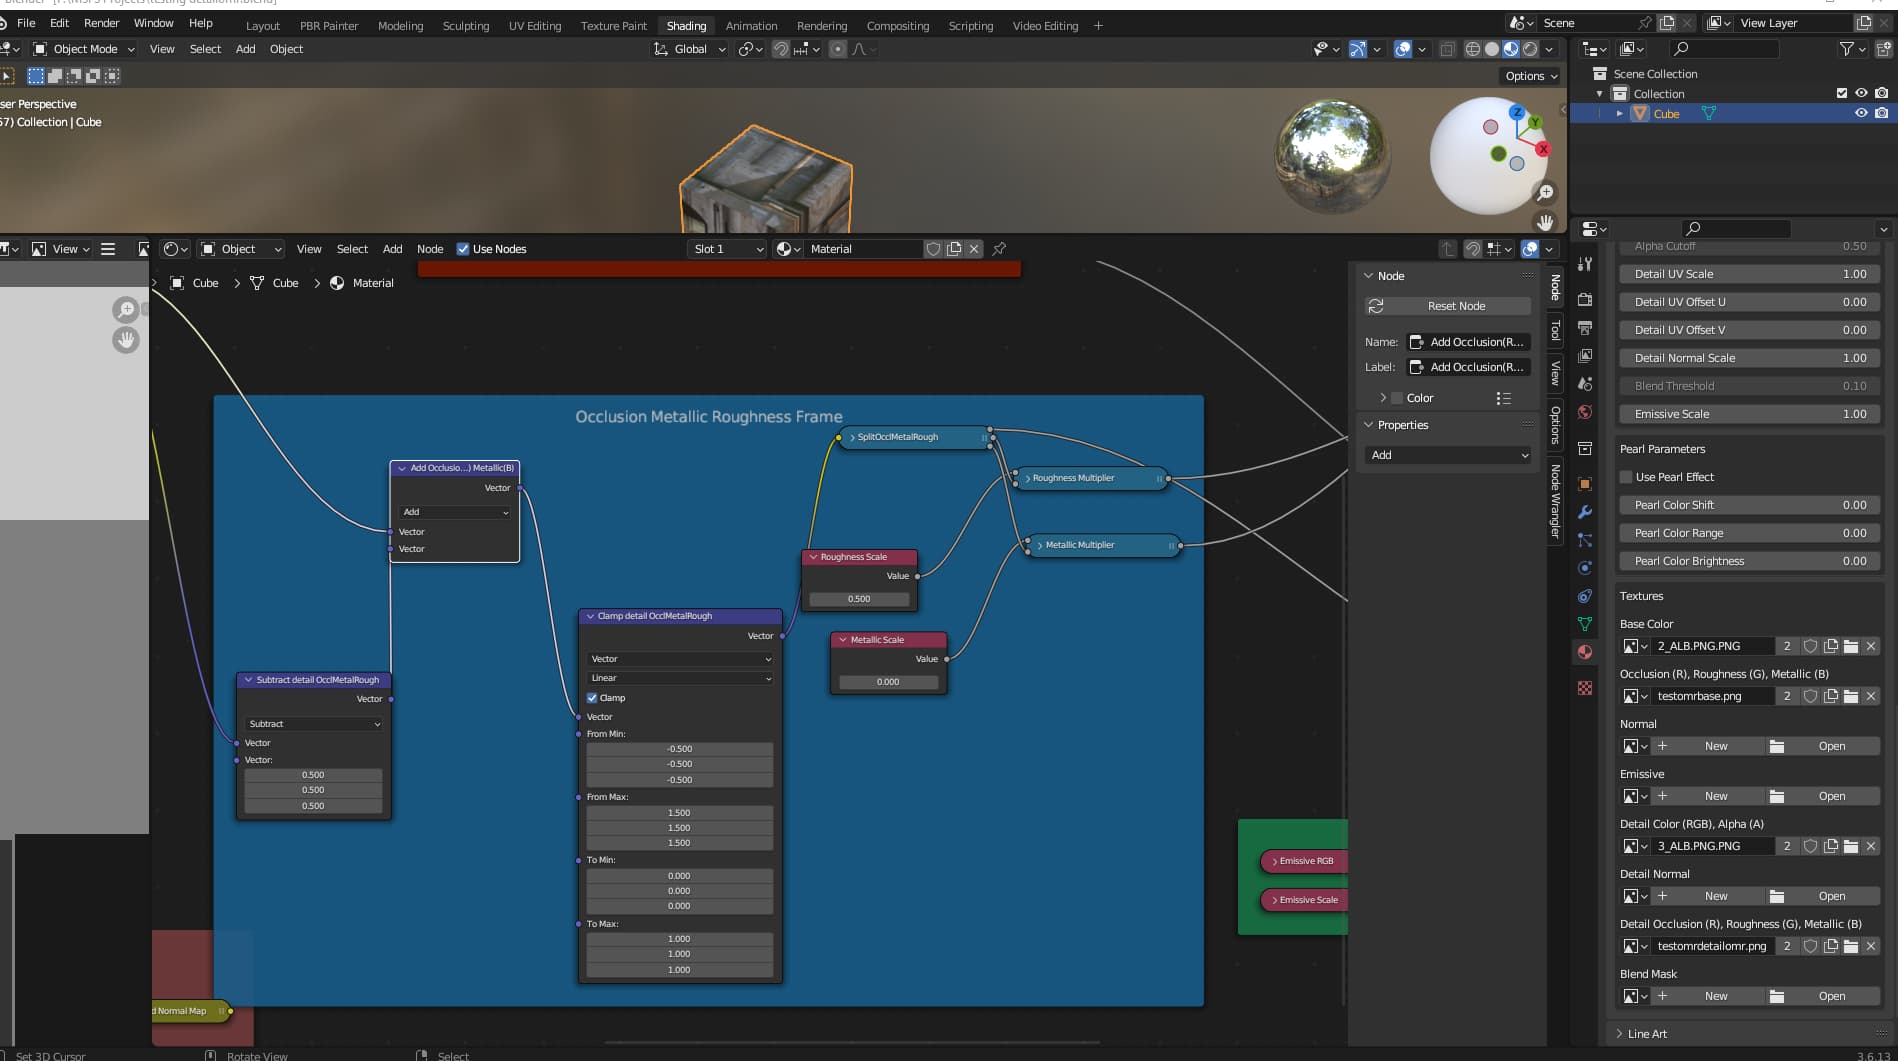
Detail ORM
The values will be added to the primary Occlusion(R), Roughness(G), Metallic(B) in a linear fashion: a value of 0.5 will produce no changes, values below 0.5 will decrease the primary values and values above 0.5 will increase them.

Are you adding subtracting 0.5, are biasing the values by 0.5, are they being clamped? Is it 100% decrease or increase as you go from 0.5 down to 0 or 0.5 up to 1.0.

Is 0.75 50% higher than 0.5? or 0.25 50% low than 0.5 values.

There seems to be a difference in the implementation of Detail Color and Detail ORM. Looking at the Blender.

Both are multiply nodes, but I feel the ORM one should be add?

EDIT: is it the Primary base Color - Or the Primary base Color texture. I assume texture in both Base color and ORM cases from the SDK docs.

2 Likes

Regarding both topics (linked and OP): Some additional clarification on this would definitely be more than welcome.

I have played around with using detail textures in a hybrid fashion - combining standard “baked” texture sheets with tiling detail layers.

After a lot of tweaking I was able to get decent results blending a detail COMP and Normal with a base ALBD, COMP, and NORM, but I really had to butcher the COMP to get it to look OK. Even then, that’s for one texture, so based on the color you’re trying to blend with - it seems that there is no real one-fit-all solution.

Recently I have been working with tiling textures vs. my previous hybrid method and wanted to use a detail texture to overlay grunge on top.

I can get decent results using the detail Albedo, but when it comes to using a detail COMP/ORM to add more roughness in those areas of grunge, I have not had any success.

Working currently on a metal material, since the roughness channel is darker by default, it seems to take complete priority over the lighter roughness channel of the detail COMP. Or if I make the detail roughness completely black (shiny) it then completely covers the base roughness. So, in this method of use, the linear blending system seems to be flawed. Wherein you can go shinier, but not more rough - just based on how blending with the base texture is handled.

Based on the context of the Blend Mask description, I was hopeful that I would be able to use one to help control the placement of the grunge, however when used it seems to omit all of my detail channels. I only see my base textures in the sim with detail seemingly having no effect ( I can see it in Blender).

I am using a black and white texture for the Blend Mask. I assume this is how it is suppose to be set up. White show, black hide - like an alpha channel? The one use case I found in the base sim seems to reflect that.

As far as I am aware, the Blend Mask scale also seems to be linked to the primary UV and not the detail UV. Not a big deal in my current situation since the detail UV scale isn’t much different than the base UV scale.

With the update to the Blender export to 1.3.3 there is a new set of nodes for detail ORM.

However it still looks wrong to me.

The detail ORM texture values for RGB are multiplied by 2 and then subtract 1. - That part makes sense.

However the NodeMapRange node has the from and to ranges the same - so this node does nothing. And I feel it’s in the wrong place.

As an example - the lower bound and upper bound of the two previous nodes - -1 and +1 (Minus 1 and Plus 1) then the map node has a from of 0 to 1 - so anything less that zero input is mapped to 0. This does not agree with the documentation description I quoted in the OP.

To continue then the output of 0 to 1 is ADDED to the main ORM node data - so potentially the RGB result can be greater than 1 if you just add.

I understand that the node structure here has nothing to do with the result displayed in the sim and the blender node structure is only helping in displaying an approximation to the sim rendering. But it would be nice to have a closer representation.

Blender 3.6 ASOBO 1.3.3 nodes

Suggested new node setup - change links and bias detail ORM by 0.5 subtract, back to -0.5 to +0.5 to add to original ORM and clamp 0 to 1

Adding a ORM value of 1 to a detail OMR value of 1 - which is changed to (1 - 0.5 = 0.5) +1 = 1.5
Adding a ORM value of 1 to a detail OMR value of 0.5 - which is changed to (0.5 - 0.5 = 0) + 1 = 1
Adding a ORM value of 1 to a detail OMR value of 0 - which is changed to (0 - 0.5 = -0.5) + 1 = 0.5

or

Adding a ORM value of 0 to a detail OMR value of 1 - which is changed to (1 - 0.5 = 0.5) +0 = 0.5
Adding a ORM value of 0 to a detail OMR value of 0.5 - which is changed to (0.5 - 0.5 = ) + 0 = 0
Adding a ORM value of 0 to a detail OMR value of 0 - which is changed to (0 - 0.5 = -0.5) + 0 = -0.5

You can see that a detail ORM of 0.5 keeps the original ORM value. The ORM of 1 maps to 1.5 if both ORM and Detail ORM are 1 and ORM of 0 maps to -0.5 if both ORM and Detail ORM are zero.

New suggested links and values

EDIT: added issue to git site

1 Like

To me the Detail textured and the Blend Mask doesn’t make sense. We should be allowed to control the strength of the detail within the bounds of the mask.

My suggested changes don’t seem to make that much difference - My issue can be closed. I just think the SDK description for these detail textures is confusing.